
本部分时LFS说的非常不清楚的部分,书中的实战的指导也非常差,也没有给出模板。
而且按照实际部署的过程看,原书对于可能不需要运行的代码未给出说明。
本篇包含原书第9-11章内容
本篇是用于配置LFS的配置(包括LFS启动后用到的配置+linux内核的编译)。
主要还是在chroot环境中配置,除了grub需要host环境以root运行。
- 重启进入chroot环境
#挂载分区
mount /dev/sda2 /mnt/lfs
export LFS=/mnt/lfs
以下代码可以是脚本readForLFS.sh

#映射
mount -v --bind /dev $LFS/dev
mount -v --bind /dev/pts $LFS/dev/pts
mount -vt proc proc $LFS/proc
mount -vt sysfs sysfs $LFS/sys
mount -vt tmpfs tmpfs $LFS/run
if [ -h $LFS/dev/shm ]; then
  mkdir -pv $LFS/$(readlink $LFS/dev/shm)
fi
#进入chroot
chroot "$LFS" /usr/bin/env -i          \
    HOME=/root TERM="$TERM"            \
    PS1='(lfs chroot) \u:\w\$ '        \
    PATH=/usr/bin:/usr/sbin            \
/bin/bash --login- LFS配置
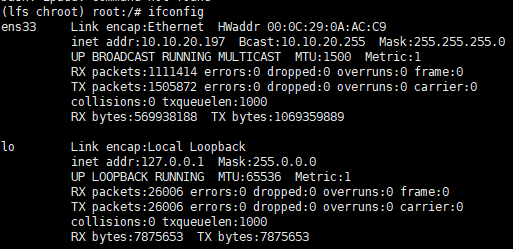
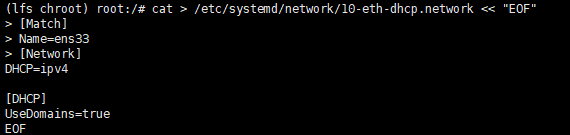
1)创建网络设备并配置dhcp
ln -s /dev/null /etc/systemd/network/99-default.link

ifconfig

cat > /etc/systemd/network/10-ether0.link << "EOF"
[Match]
# Change the MAC address as appropriate for your network device
MACAddress=00:0C:29:0A:AC:C9
[Link]
Name=ether0
EOF

cat > /etc/systemd/network/10-eth-dhcp.network << "EOF"
[Match]
Name=ens33
[Network]
DHCP=ipv4
[DHCP]
UseDomains=true
EOF

2)DNS
ln -sfv /run/systemd/resolve/resolv.conf /etc/resolv.conf
3)hostname
echo "<lfs>" > /etc/hostname

cat > /etc/hosts << "EOF"
# Begin /etc/hosts
127.0.0.1 localhost.localdomain localhost
# End /etc/hosts
EOF
4)时间问题
cat > /etc/adjtime << "EOF"
0.0 0 0.0
0
LOCAL
EOF

timedatectl set-local-rtc 1
![]()
![]()
6)inputrc
cat > /etc/inputrc << "EOF"
# Begin /etc/inputrc
# Modified by Chris Lynn <roryo@roryo.dynup.net>
# Allow the command prompt to wrap to the next line
set horizontal-scroll-mode Off
# Enable 8bit input
set meta-flag On
set input-meta On
# Turns off 8th bit stripping
set convert-meta Off
# Keep the 8th bit for display
set output-meta On
# none, visible or audible
set bell-style none
# All of the following map the escape sequence of the value
# contained in the 1st argument to the readline specific functions
"\eOd": backward-word
"\eOc": forward-word
# for linux console
"\e[1~": beginning-of-line
"\e[4~": end-of-line
"\e[5~": beginning-of-history
"\e[6~": end-of-history
"\e[3~": delete-char
"\e[2~": quoted-insert
# for xterm
"\eOH": beginning-of-line
"\eOF": end-of-line
# for Konsole
"\e[H": beginning-of-line
"\e[F": end-of-line
# End /etc/inputrc
EOF
7)创建 /etc/shells 文件
cat > /etc/shells << "EOF"
# Begin /etc/shells

/bin/sh
/bin/bash

# End /etc/shells
EOF
8)禁用引导时自动清屏
mkdir -pv /etc/systemd/system/getty@tty1.service.d

cat > /etc/systemd/system/getty@tty1.service.d/noclear.conf << EOF
[Service]
TTYVTDisallocate=no
EOF
9)覆盖系统服务默认行为
mkdir -pv /etc/systemd/system/foobar.service.d
cat > /etc/systemd/system/foobar.service.d/foobar.conf << EOF
[Service]
Restart=always
RestartSec=30
EOF
10)处理dump
mkdir -pv /etc/systemd/coredump.conf.d
cat > /etc/systemd/coredump.conf.d/maxuse.conf << EOF
[Coredump]
MaxUse=5G
EOF
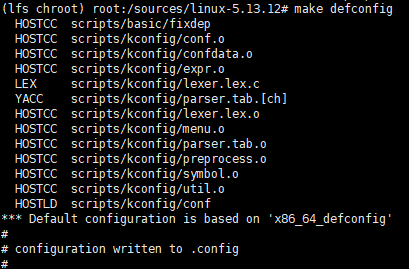
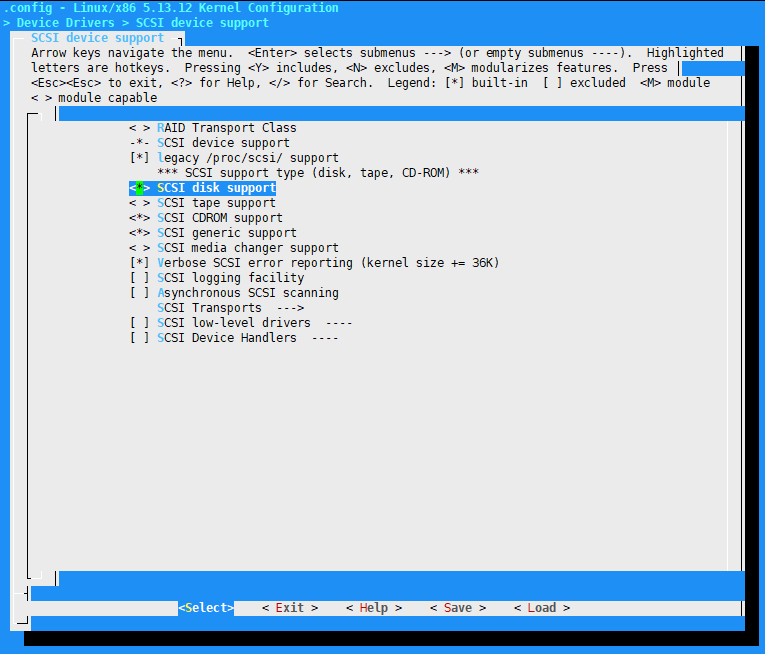
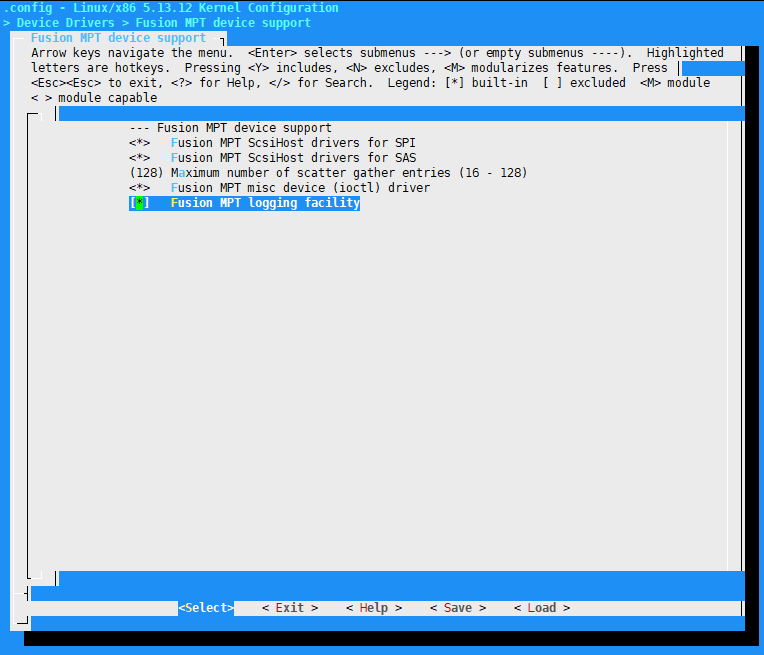
- 安装内核(实际此处编译了两次)
tar xvf linux-5.13.12.tar.xz
cd linux-5.13.12
make mrproper
make defconfig
make menuconfig
make -j4
make modules_install
cp -iv arch/x86/boot/bzImage /boot/vmlinuz-5.13.12-lfs-11.0-systemd
cp -iv System.map /boot/System.map-5.13.12
cp -iv .config /boot/config-5.13.12
install -d /usr/share/doc/linux-5.13.12
cp -r Documentation/* /usr/share/doc/linux-5.13.12

install -v -m755 -d /etc/modprobe.d
cat > /etc/modprobe.d/usb.conf << "EOF"
# Begin /etc/modprobe.d/usb.conf
install ohci_hcd /sbin/modprobe ehci_hcd ; /sbin/modprobe -i ohci_hcd ; true
install uhci_hcd /sbin/modprobe ehci_hcd ; /sbin/modprobe -i uhci_hcd ; true
# End /etc/modprobe.d/usb.conf
EOF

cd ..
rm -rf linux-5.13.12
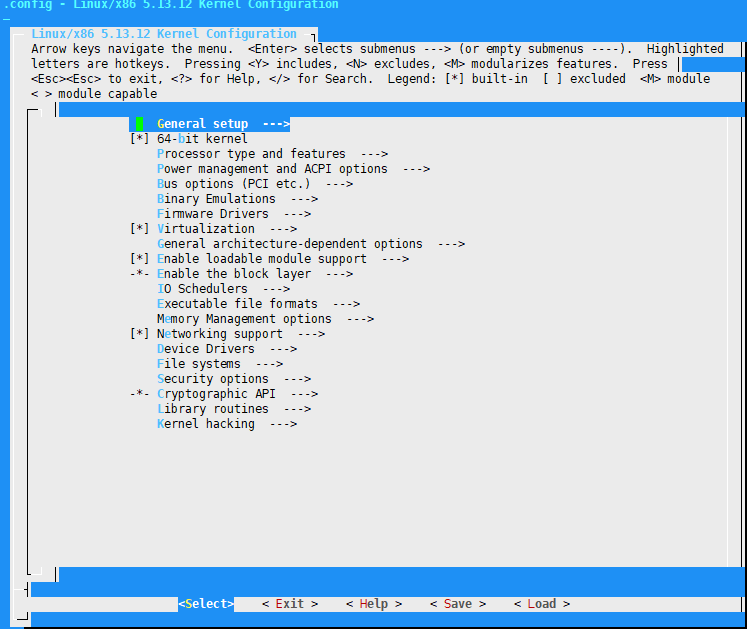
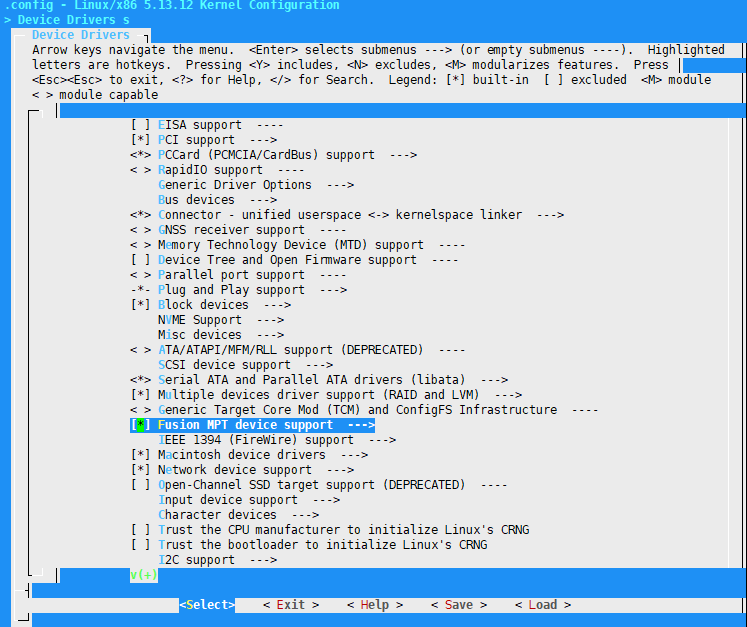
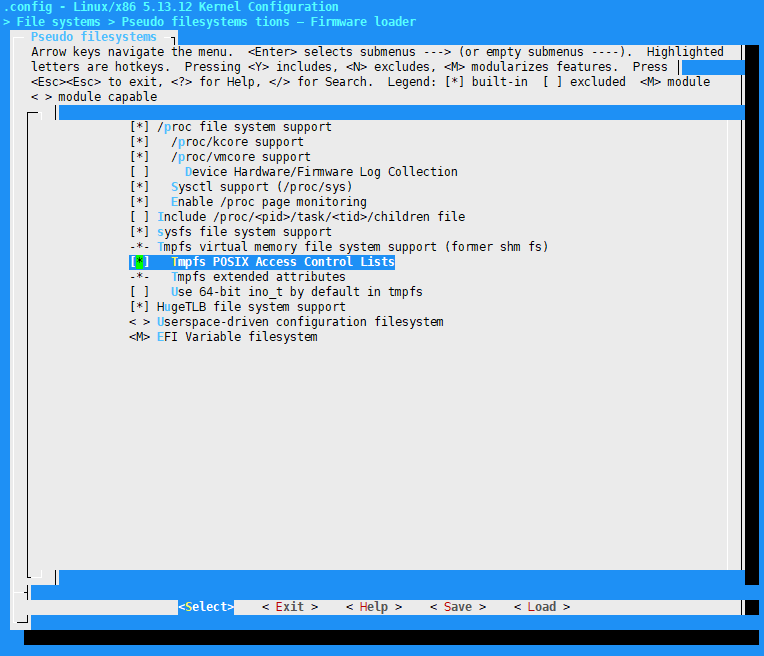

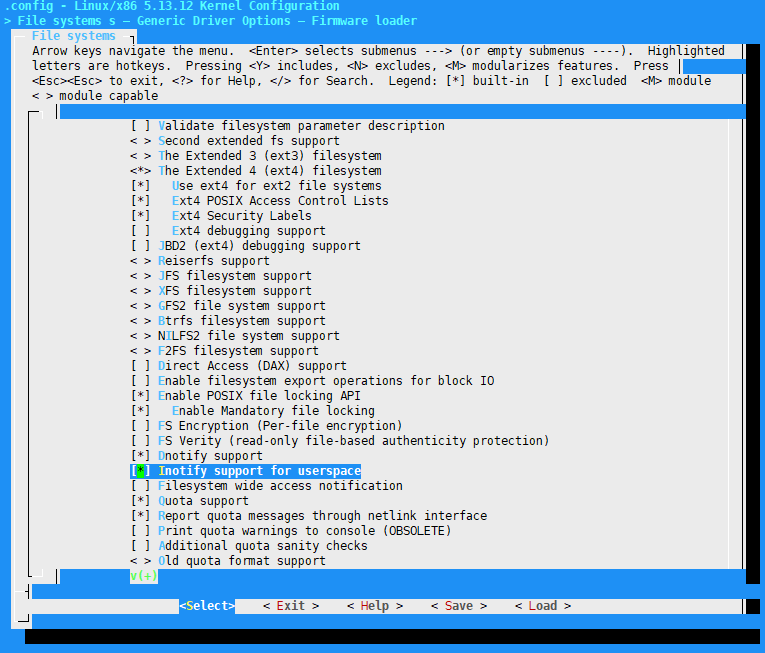

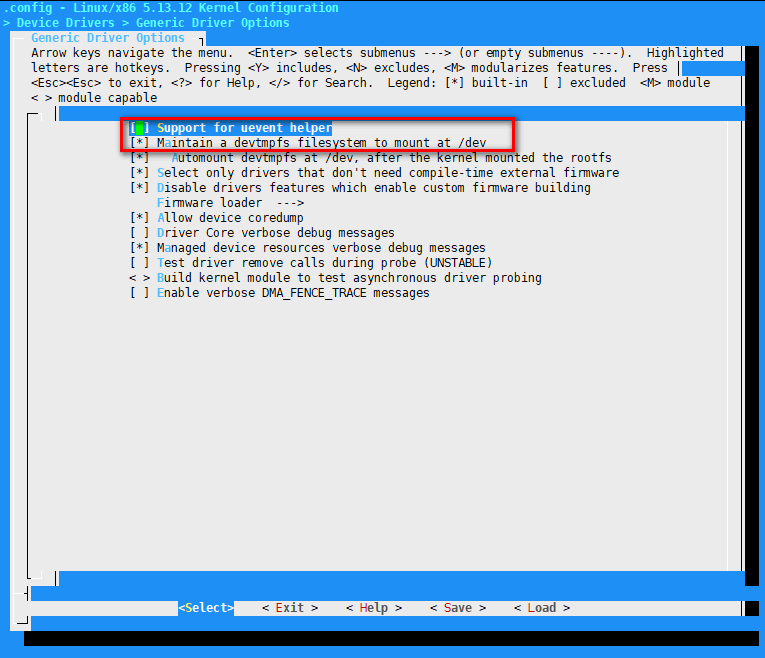
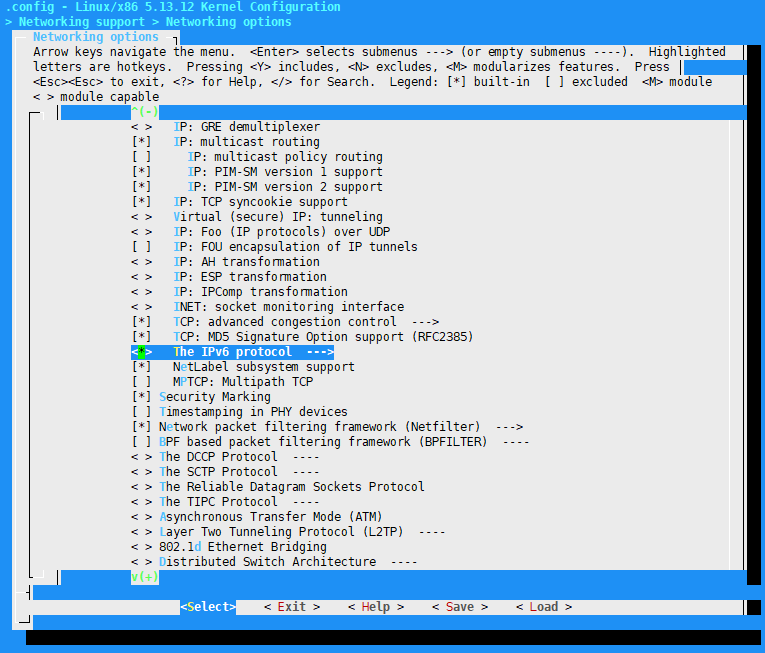
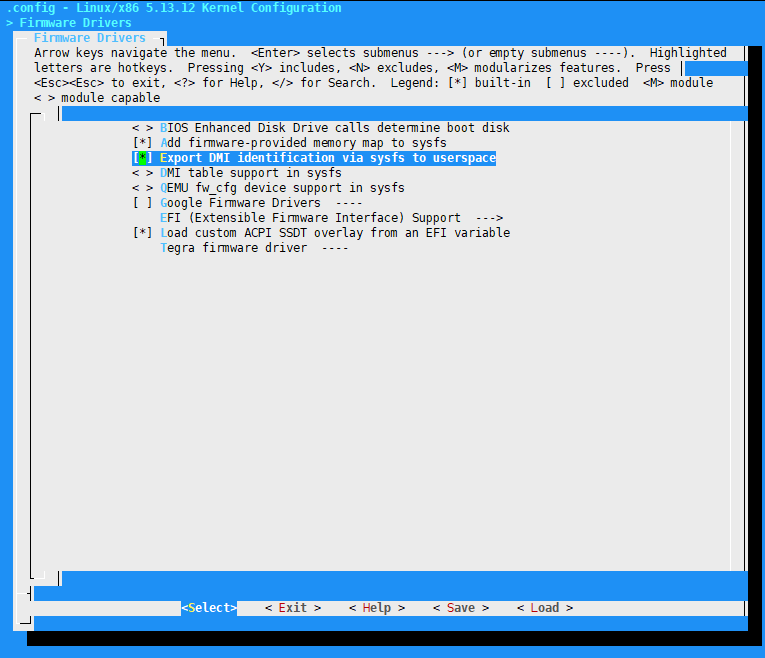
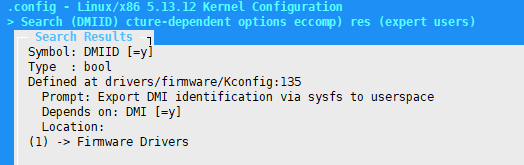
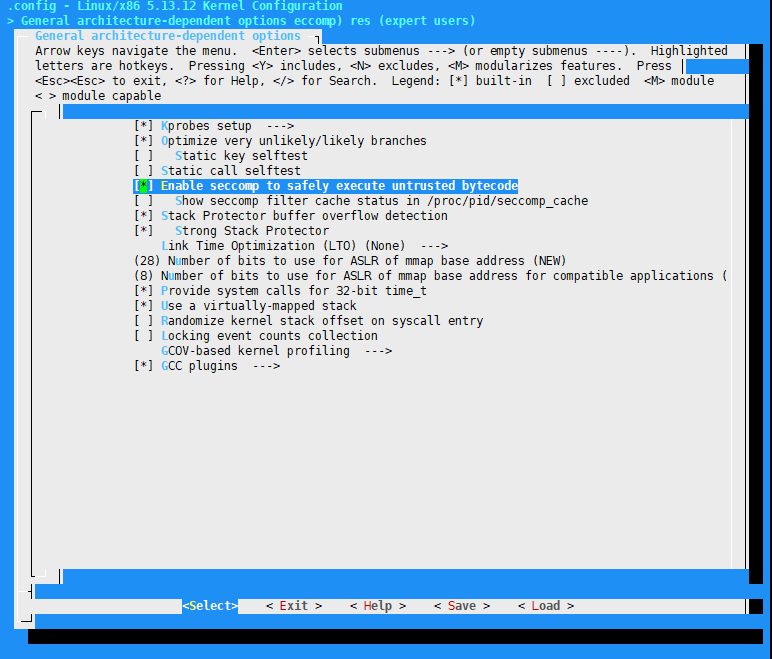
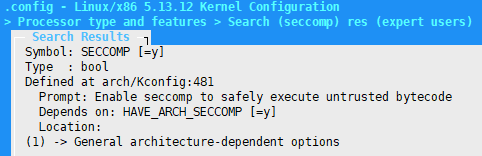
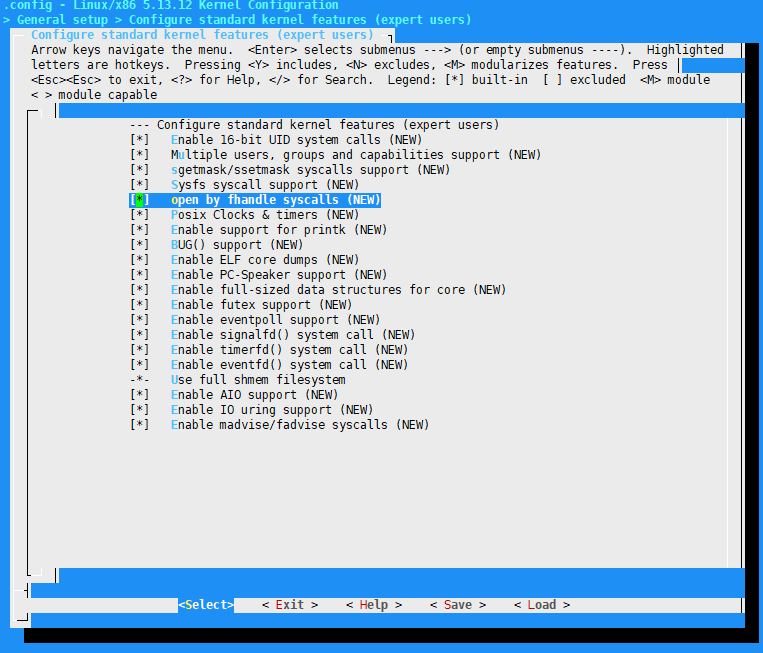
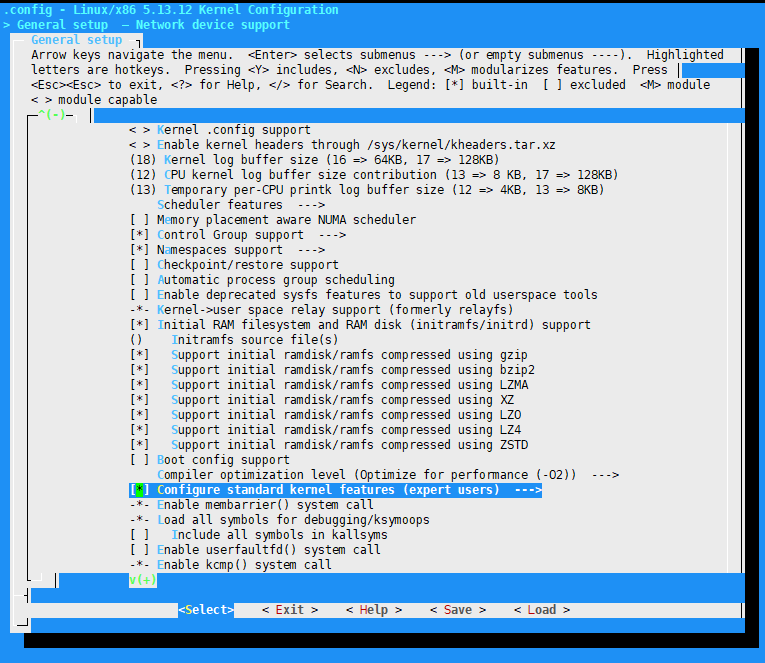
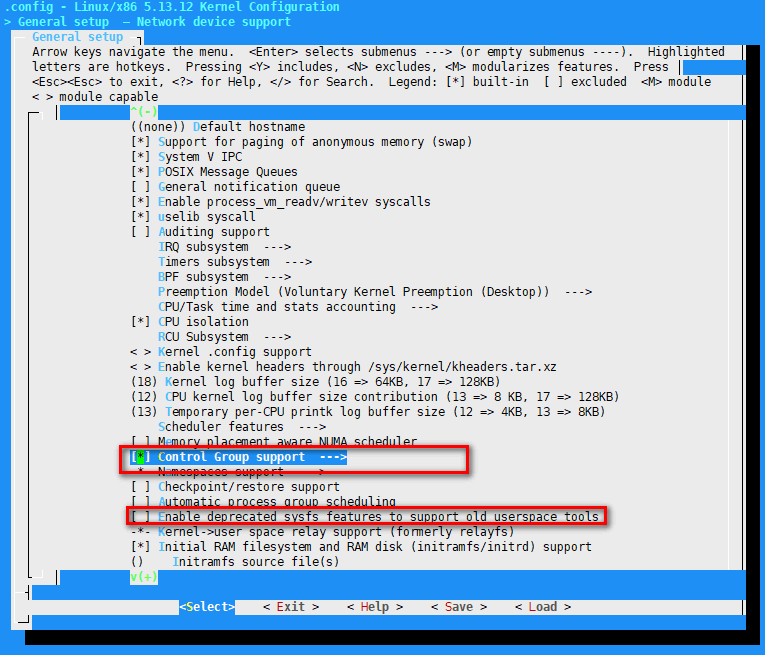
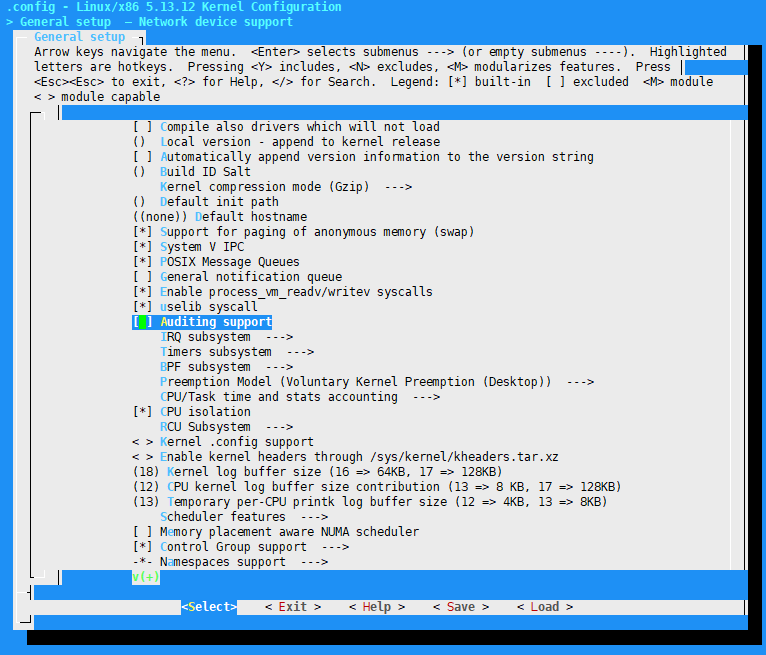
对于在vmware下测试需要额外选择编译以下部分
- 创建引导(此处非常容易出错)
由于在vmware下通过ubuntu实现的host,准备在编译好lfs不再保留host系统(ubuntu),因此不需重新安装grub
本处运行在host下以root运行以下的代码
cat > /boot/grub/grub.cfg << "EOF"
# Begin /boot/grub/grub.cfg
set default=0
set timeout=5
insmod ext2
set root=(hd0,2)
menuentry "GNU/Linux, Linux 5.13.12-lfs-11.0-systemd" {
linux /boot/vmlinuz-5.13.12-lfs-11.0-systemd root=/dev/sda2 ro
}
EOF
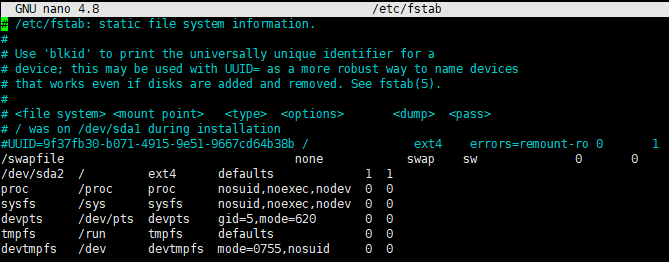
nano /etc/fstab
修改如下:
/swapfile none swap sw 0 0
/dev/sda2 / ext4 defaults 1 1
proc /proc proc nosuid,noexec,nodev 0 0
sysfs /sys sysfs nosuid,noexec,nodev 0 0
devpts /dev/pts devpts gid=5,mode=620 0 0
tmpfs /run tmpfs defaults 0 0
devtmpfs /dev devtmpfs mode=0755,nosuid 0 0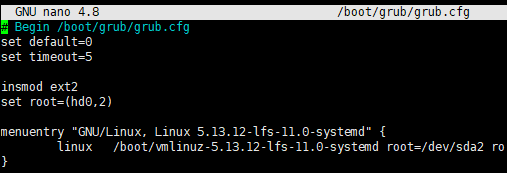
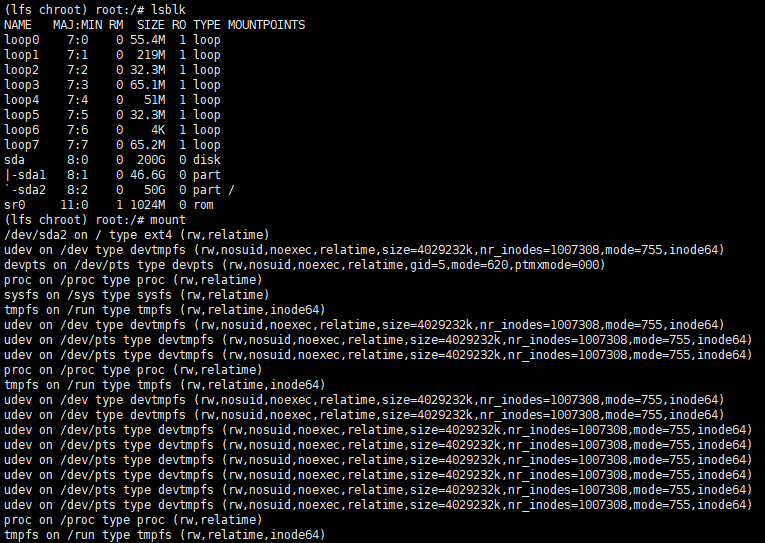
补充在chroot环境下的目录结构
- 收尾(chroot环境中配置)
echo 11.0-systemd > /etc/lfs-release

cat > /etc/lsb-release << "EOF"
DISTRIB_ID="Linux From Scratch"
DISTRIB_RELEASE="11.0-systemd"
DISTRIB_CODENAME="<your name here>"
DISTRIB_DESCRIPTION="Linux From Scratch"
EOF

cat > /etc/os-release << "EOF"
NAME="Linux From Scratch"
VERSION="11.0-systemd"
ID=lfs
PRETTY_NAME="Linux From Scratch 11.0-systemd"
VERSION_CODENAME="<your name here>"
EOF
解除chroot挂载
exit #退出chroot环境进入host
umount -Rv $LFS
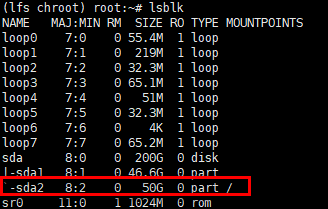
- 重启系统和效果检测(host环境中重启)
exit #退出chroot环境
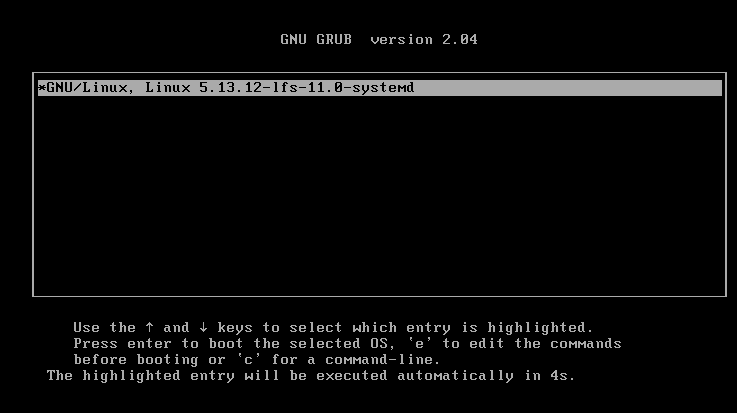
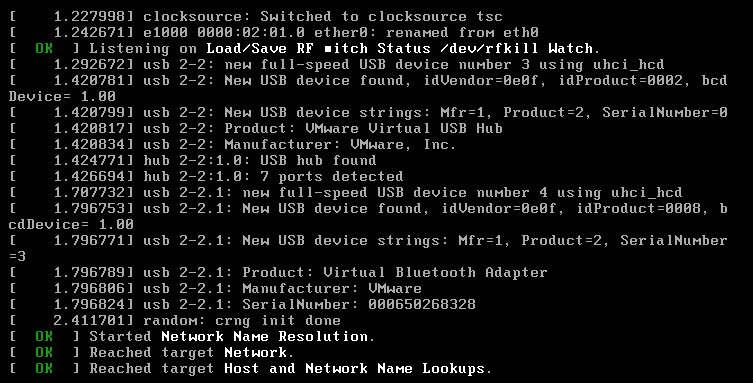
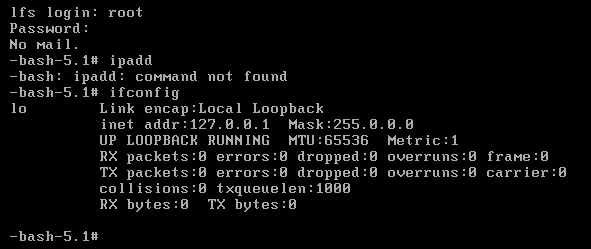
测试通过
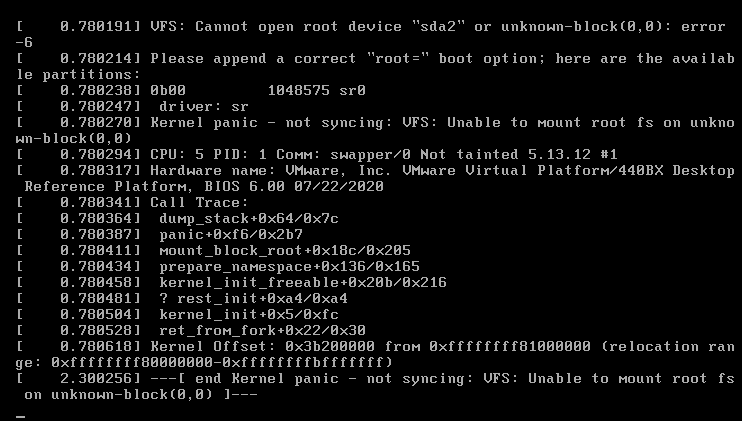
补充说明
1)典型的失败情况,vfs无法挂载
参考资料:
- https://www.jianshu.com/p/2201d0367588
- https://blog.51cto.com/deidara/99930
- https://blog.csdn.net/serika00/article/details/43032529
- https://www.linuxquestions.org/questions/linux-from-scratch-13/kernel-panic-device-not-found-4175677832/
- https://www.linuxquestions.org/questions/linux-laptop-and-netbook-25/issue-on-boot-for-lfs-system-vfs-cannot-open-root-device-null-or-unknown-block-0-0-error-6-a-4175610572/
- https://www.linuxquestions.org/questions/linux-from-scratch-13/lfs-7-5-kernel-panic-error-unable-to-mount-rootfs-4175506219/
- https://blog.csdn.net/jiangwei0512/article/details/78172642